Store Export - Shopify backup ZIP

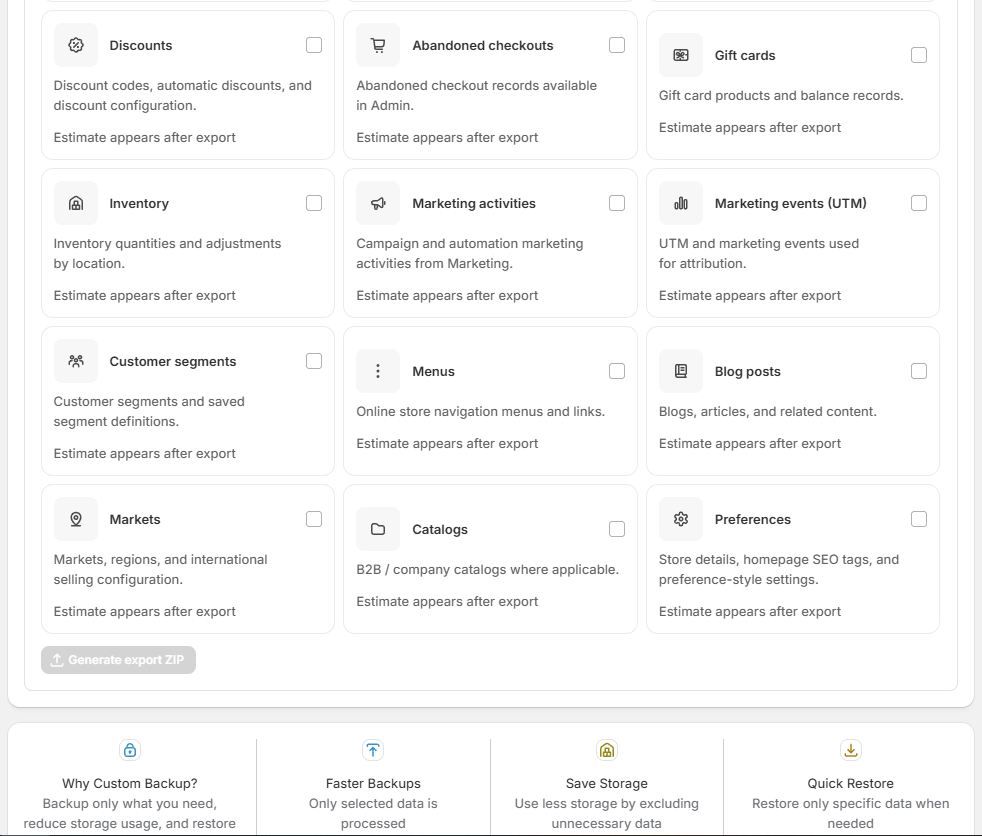
Export store data lets you select one or all of 21 resource types: products, orders, customers, images, pages, themes, theme images, apps, settings, discounts, abandoned checkouts, gift cards, inventory, marketing activities, marketing events, customer segments, menus, blog posts, markets, catalogs, and preferences.

Use Select all resources or pick individual cards, then click Generate export ZIP. Track jobs in Export history and download the archive when complete.

Guides

Store Export

How to choose resources and generate an all-in-one backup ZIP in Sbit: All-in-One Migration.

Last updated: May 15, 2026

Overview

The Export store data screen lets you pick exactly what to include in a backup. You can export everything at once or only the resource types you need. The app builds one ZIP archive you can download, store safely, or import into another store with the same app.

Choose resources to export. Select one or many resources, or choose Select all resources. The app builds one all-in-one ZIP you can import in another store with this app.

Open Export store data

From the app dashboard, open Export store data. The page shows your current selection count (for example, 0 of 21 selected) and an Export history button in the top right to review past exports.

Export store data screen showing resource cards for Products, Orders, Customers, and other core store data with checkboxes and item counts
Export store data - core resources (Products, Orders, Customers, Images, Pages, Themes, and more). Use Export history to open previous backup jobs.
  • Select all resources - checks every resource type in one click.
  • Individual cards - each card shows a short description and an item count when available (for example, 20 products, 3 orders).
  • Some types show Estimate appears after export when counts are not known until the job runs (for example theme images, apps, settings).

Select resources

Scroll the grid to find marketing, navigation, and configuration resources. Check the boxes for each category you want in the ZIP. You can mix core catalog data with discounts, inventory, menus, markets, and preferences.

Additional export resource cards including Discounts, Gift cards, Inventory, Marketing, Menus, Markets, and Generate export ZIP button
More resource types - discounts, marketing, menus, markets, catalogs, and preferences - plus Generate export ZIP and custom-backup benefits.

All 21 resource types

The export screen includes these resource categories:

  • Products - Products, variants, collections, and catalog data.
  • Orders - Orders, line items, payments, and fulfillment data.
  • Customers - Customers, default addresses, and profile fields.
  • Images and references - Product and theme image references from catalog and themes.
  • Pages - Online store pages and their content.
  • Themes - Installed themes, templates, config, and metadata.
  • Theme images - Image and asset files from active theme packages.
  • Apps - Sales channels and app-related shop configuration snapshots.
  • Settings - Shipping, taxes, locations, gateways, and shop settings.
  • Discounts - Discount codes, automatic discounts, and configuration.
  • Abandoned checkouts - Abandoned checkout records from Admin.
  • Gift cards - Gift card products and balance records.
  • Inventory - Inventory quantities and adjustments by location.
  • Marketing activities - Campaign and automation activities from Marketing.
  • Marketing events (UTM) - UTM and marketing events used for attribution.
  • Customer segments - Customer segments and saved segment definitions.
  • Menus - Online store navigation menus and links.
  • Blog posts - Blogs, articles, and related content.
  • Markets - Markets, regions, and international selling configuration.
  • Catalogs - B2B / company catalogs where applicable.
  • Preferences - Store details, homepage SEO tags, and preference-style settings.

Generate export ZIP

After you select at least one resource, click Generate export ZIP at the bottom of the page. The app starts an export job you can track from Jobs or Export history. When the job finishes, download the ZIP from the job details.

  1. Select the resources you need (or use Select all resources).
  2. Click Generate export ZIP.
  3. Wait for the export job to complete.
  4. Download the archive and store it somewhere safe.

Why custom backup

At the bottom of the export page, the app explains why selective export helps:

Why Custom Backup?

Backup only what you need, reduce storage usage, and restore with control.

Faster Backups

Only selected data is processed, so jobs can finish sooner.

Save Storage

Use less storage by excluding unnecessary data from the ZIP.

Quick Restore

Restore only specific data when you import on another store.